Blender Add-on for Neverwinter Nights 2
Tutorial: Animating a simple placeable
In this tutorial we are going to take the banner of Tyr, which is a placeable included in NWN2, and make it animated. But first we are going to explain some basics.
This tutorial uses Blender 3.3.1.
Placeable Animations
A placeable can have many animations. Each animation is stored in a file named same as the placeable followed by an underscore, the name of the animation and the extension GR2. There is a set of standard placeable animations that are used by NWN2:
- placeable_name_IDLE.GR2: Default animation. Used also for the closed state.
- placeable_name_PLC_OPENIDLE.GR2: Animation for the open state.
- placeable_name_PLC_OPEN.GR2: Opening animation (from closed to open).
- placeable_name_PLC_CLOSE.GR2: Closing animation (from open to closed).
- placeable_name_PLC_TURNON.GR2: Activating animation.
- placeable_name_DR_OPEN1.GR2: Opening door animation (direction 1, e.g. push).
- placeable_name_DR_OPEN2.GR2: Opening door animation (direction 2, e.g. pull).
Only the IDLE animation is required.
Animation Blending
For the placeable Chest (01 Medium), we find in Data\lod-merge.zip two
animations:
- PLC_ML_CHESTM01_IDLE.GR2: Idle animation for the closed state.
- PLC_ML_CHESTM01_PLC_OPENIDLE.GR2: Idle animation for the open state.
However, if you click the chest in game to open or close it, you will see opening and closing animations. Why is that? That is because the transition from one animation to another animation is not instant. Instead, the NWN2 engine transitions gradually, blending the two animations. This way, if you want to animate a placeable, you can save from making some animations as long as the blending produces the result you want.
Note: For the animation blending to work, the IDLE animation must have only one frame.
Step 1: Import the MDB
- Extract PLC_MC_TyrBanner.MDB from Data\NWN2_Models.zip located at the NWN2 install directory.
- Open Blender.
-
Go to File > Import > Neverwinter Nights 2 (.mdb/.gr2)
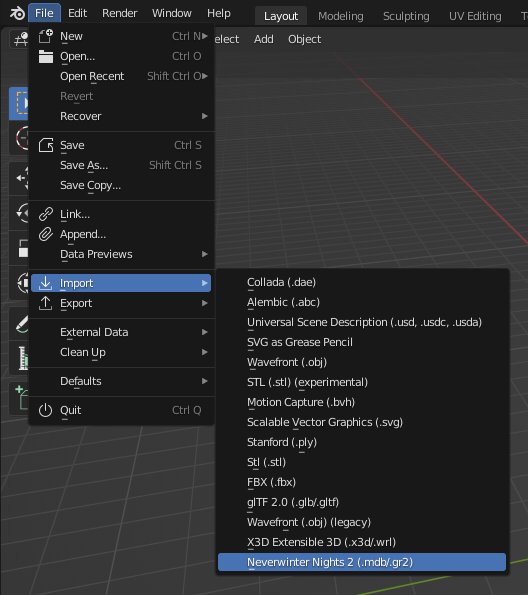
-
Navigate to the directory where PLC_MC_TyrBanner.MDB is located, select it and click Import MDB/GR2 or double click the file.
Note: The import function should automatically extract the textures used by the models (PLC_MC_TyrBanner.dds and PLC_MC_TyrBanner_N.dds).
Step 2: Animate the model
Now animate the model as you wish.
Step 3: Export the GR2 skeleton
-
In object mode, select the banner, go to the panel NWN2 in the object properties and check Base Part.

-
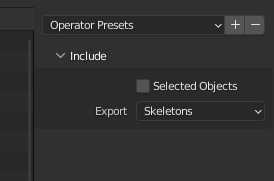
Go to File > Export > Neverwinter Nights 2 (.gr2)

-
Select Skeletons in the Export field.
-
Navigate to the directory where you want to export, type the file name PLC_MC_TyrBanner.gr2 and click Export GR2.
Step 4: Export the GR2 animation
-
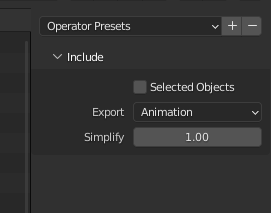
Go to File > Export > Neverwinter Nights 2 (.gr2)
-
Select Animation in the Export field.
-
Navigate to the directory where you want to export, type the file name PLC_MC_TyrBanner_idle.gr2 and click Export GR2.
Step 5: Edit placeables.2da
We have generated all the files we need, PLC_MC_TyrBanner.gr2 and PLC_MC_TyrBanner_idle.gr2, but now we must link the placeable to the skeleton. To do that, you must edit the file placeables.2da and modify the line of the placeable as follows:
- Column PlaceableModelType: set to 2.
- Column NWN2_Skeleton: set to PLC_MC_TyrBanner.
Video showing final result: https://youtu.be/tB5HyjDmG0A